

How To Cut Something In Half In Photoshop
To split an image in half in Photoshop, you can hands do so vertically, horizontally, or diagonally. Using the marquee tools and the Polygonal Lasso tool, your images tin can be split in but a couple of clicks. Before nosotros dive into the nitty-gritty of the procedure, here's one of the easiest ways to complete this procedure.
To separate images in half in Photoshop, select the marquee tool by pressing Chiliad, then click and drag over half of your paradigm to create a rectangular selection. With the selection active, right-click and select New Layer Via Cut. This will cutting the image in half and identify the selected one-half on a new layer.
At present to brand this process even more authentic, yous'll learn how to utilize guides to help brand your cutouts absolutely perfect. So by the end of this tutorial, y'all'll be an prototype splitting pro and fifty-fifty know how to export your split images into different files to finish everything off!
How To Split up An Paradigm In Half In Photoshop
This first section will embrace how to split a photo in half horizontally or vertically using the Rectangular Marquee Tool. Although I am creating a horizontal split in this example, the same steps tin can be followed for a vertical split. Here's how you do it:
Step 1: Import Your Prototype Into Photoshop
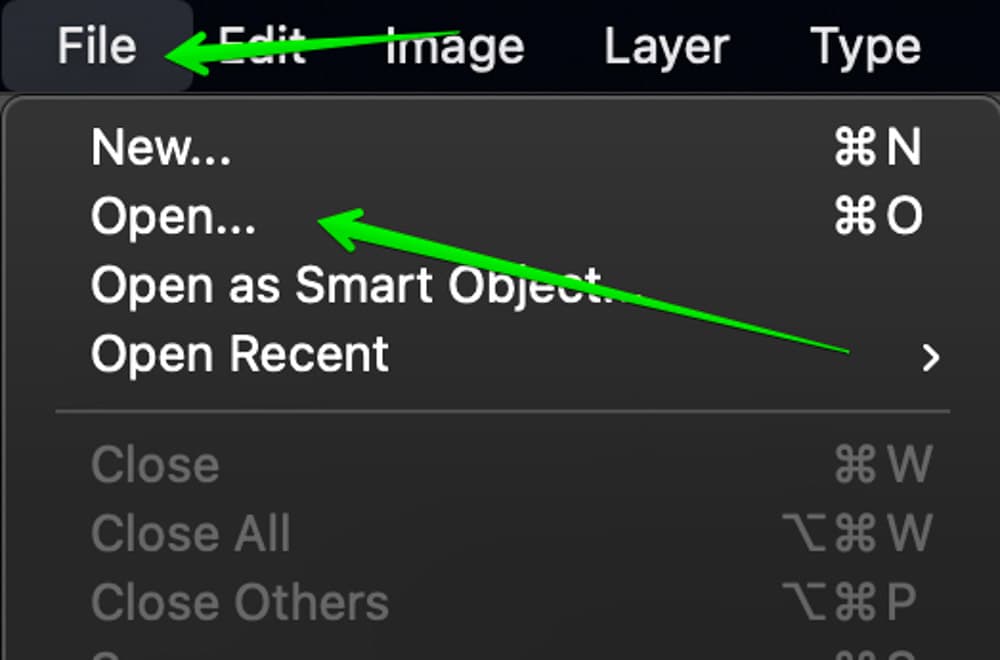
Open Photoshop, click on File > Open, or press Command/Command + O on your keyboard.
Select your image and then click on 'Open up' to bring it into Photoshop. If you already have a projection open, you tin drag and driblet your images from your computer into the Photoshop workspace instead.
Pace two: Create A Guide In The Centre Of Your Image
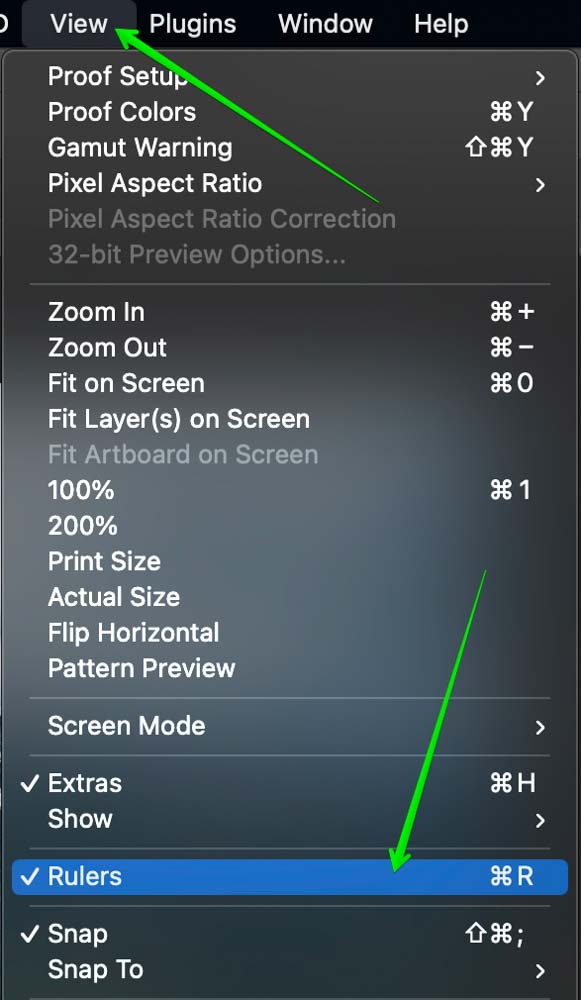
Guides are like little helpers that will assist y'all create an accurate split of your image. To create a guide, first, enable the ruler past pressing Command or Control + R.
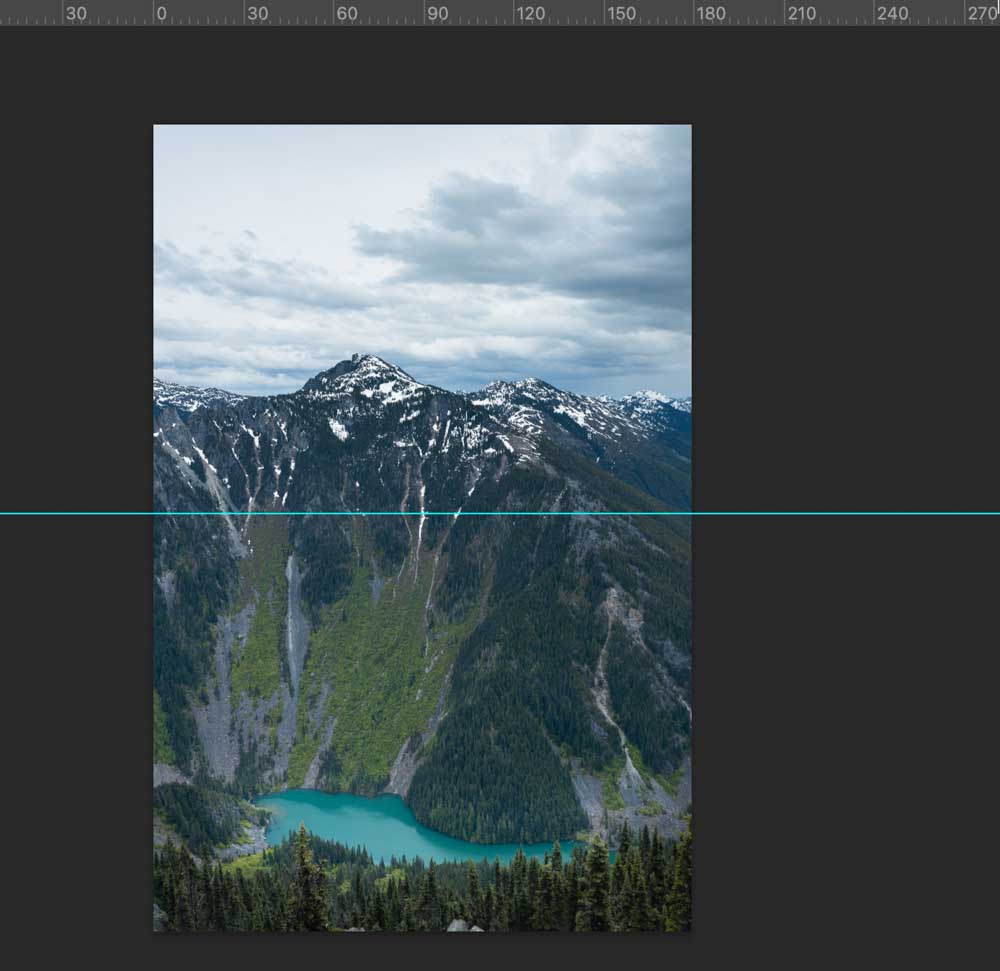
Next, have your cursor to the ruler and drag it downward from the ruler and a guide will be created.
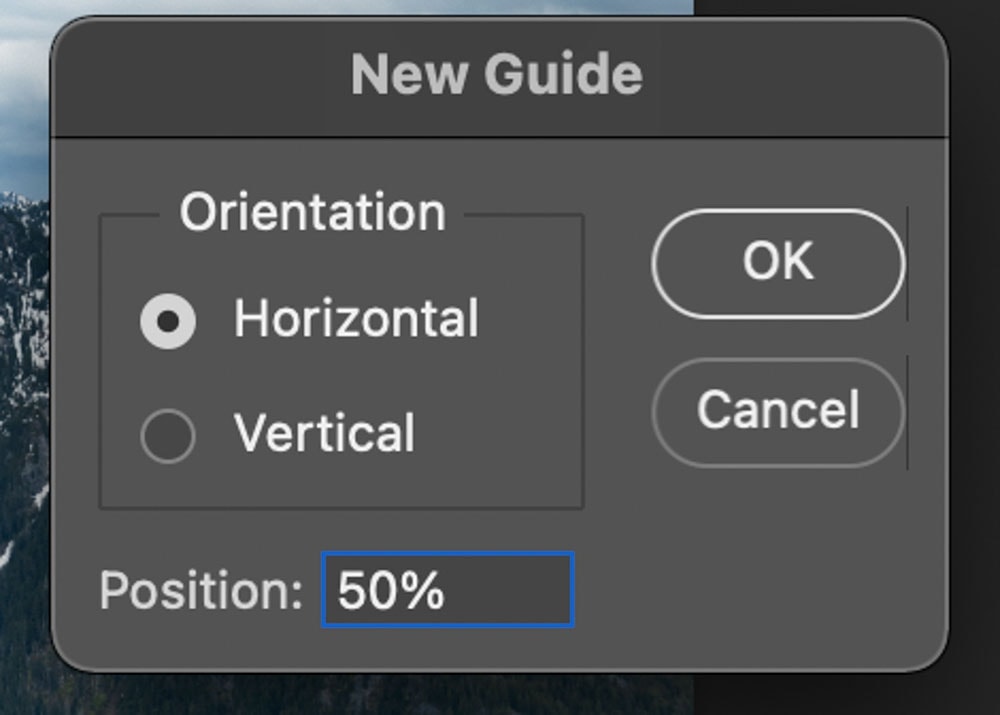
An even better mode of doing this is past going to View > New Guide.
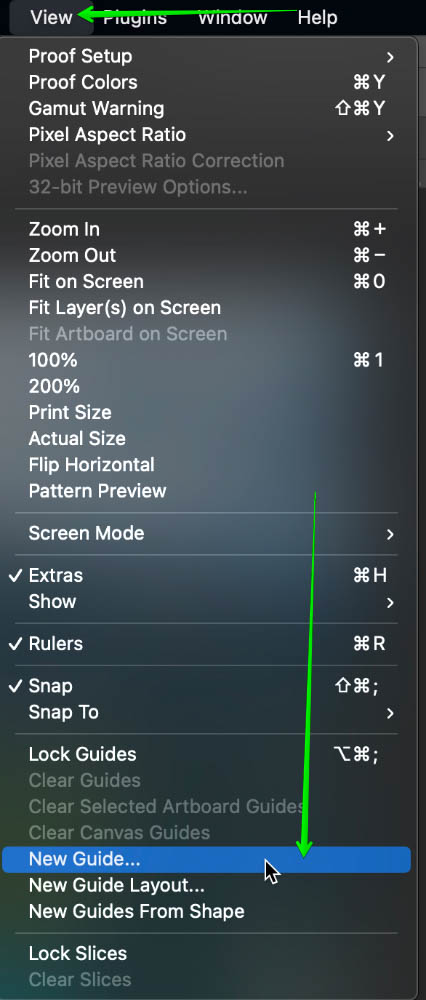
With this method, you can place a guide in an verbal location automatically. In the new guide popup that appears, you can select the option that says Horizontal and set the position value to l% to place a horizontal guide in the center of your photo. If you wanted to create a vertical split, simply select the 'Vertical' choice instead. Click OK to place your new guide on your image.
Step 3: Split Your Photo With The Rectangular Marquee Tool
At present select the Rectangular Marquee Tool and make a box around the part which y'all desire to split.

Make sure to follow the guides for accurate splitting. Luckily the Marquee Tool will snap to your guide making it like shooting fish in a barrel to make your choice match up.
Once y'all have the surface area selected, select the move tool (5), then go to Layer > New > Layer Via Cutting.
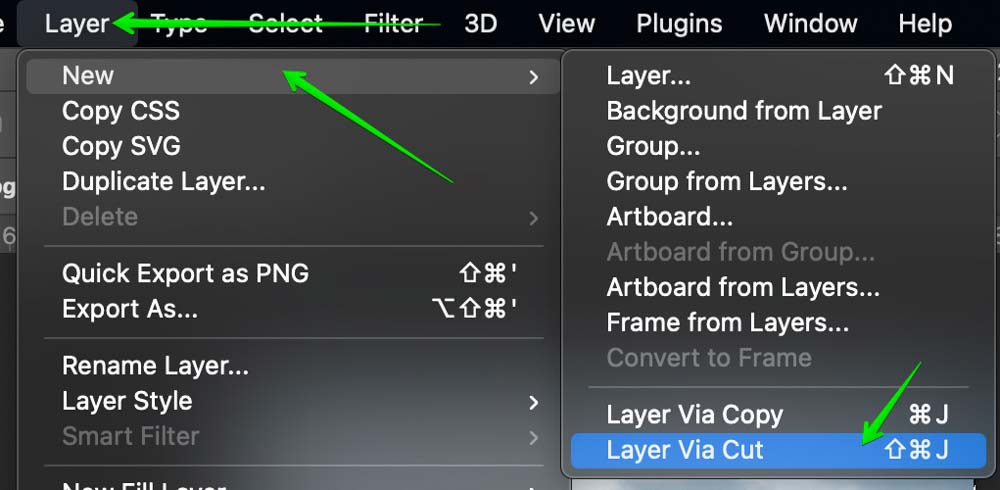
You lot can also utilise the shortcut Command or Command + Shift + J
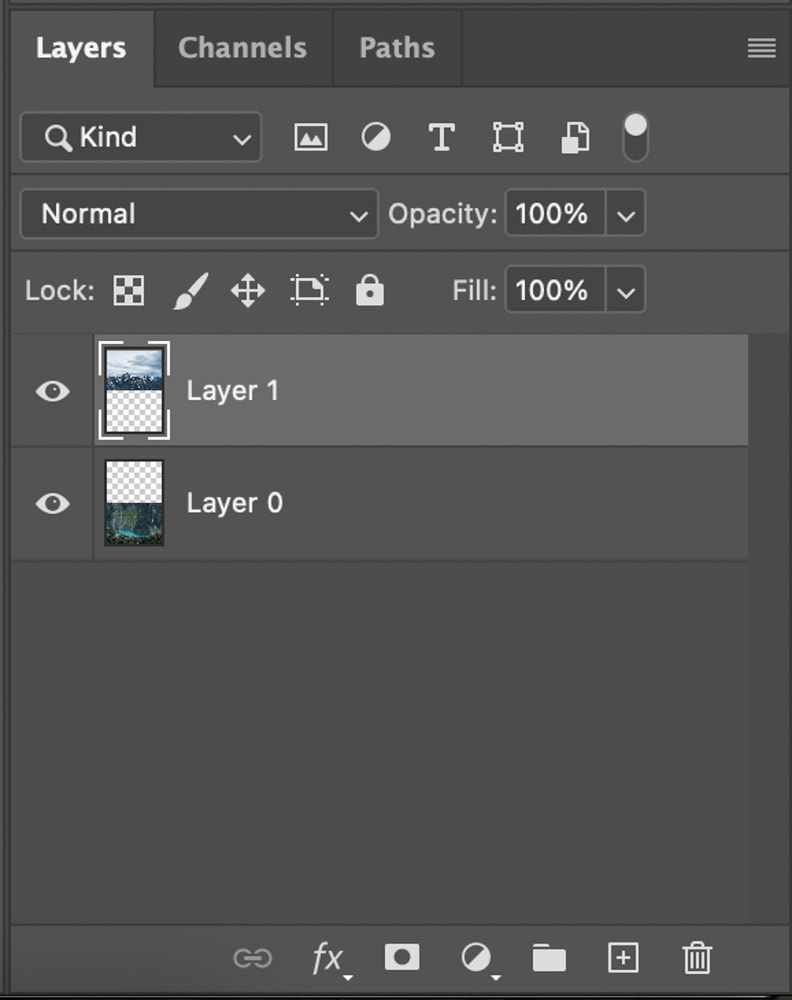
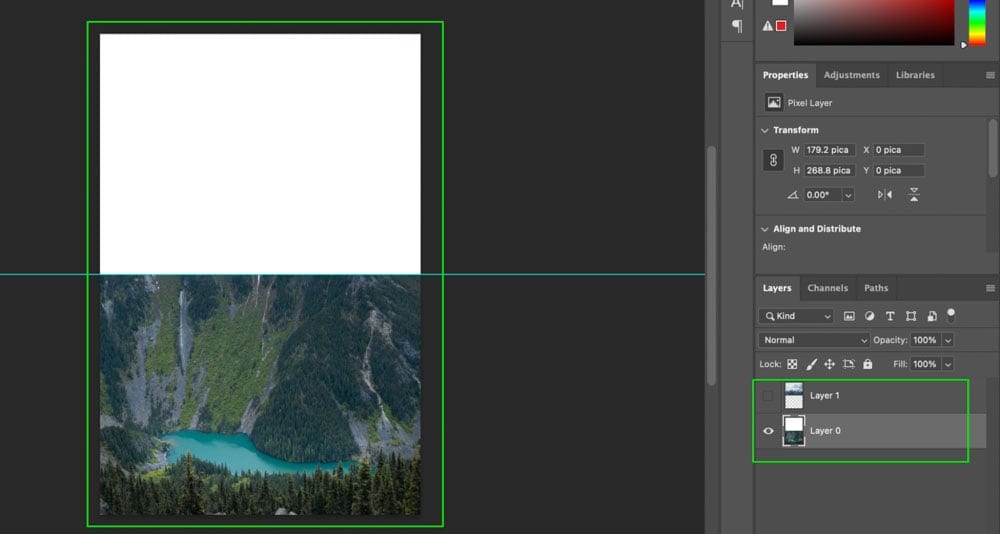
What this does is separates the layer from the original paradigm and makes a new layer from it. In the layer panel, you can see how the selected area of the epitome was removed from the original image, and placed on a new layer (Layer i).
If you select the 'Layer Via Copy' so it copies the prototype and makes a new layer without removing the selected half from the original photo. If you didn't want your image to be dissever between two different layers, this selection would just create a re-create of your selected surface area while leaving the original image untouched.
In this example I wanted the 2 parts of my image to be on dissever layers, which is why I used layer via cut instead.

How To Split An Image In Half Diagonally
If y'all want to dissever the paradigm diagonally, so the rectangular marquee tool isn't a good fit. Since this tool only creates vertical lines, it doesn't quite work for diagonal cuts in Photoshop. Luckily y'all tin use something called the Polygonal Lasso Tool which is perfect for the job.
To split an epitome in half diagonally, select the Polygonal Lasso Tool and click between the 2 corners of your prototype to create a diagonal split. Then go around the edge of your photograph to brand a choice. With the selection active, go to Layer > New > Layer Via Cutting to dissever the epitome in half.
Step 1: Select The Polygonal Lasso Tool
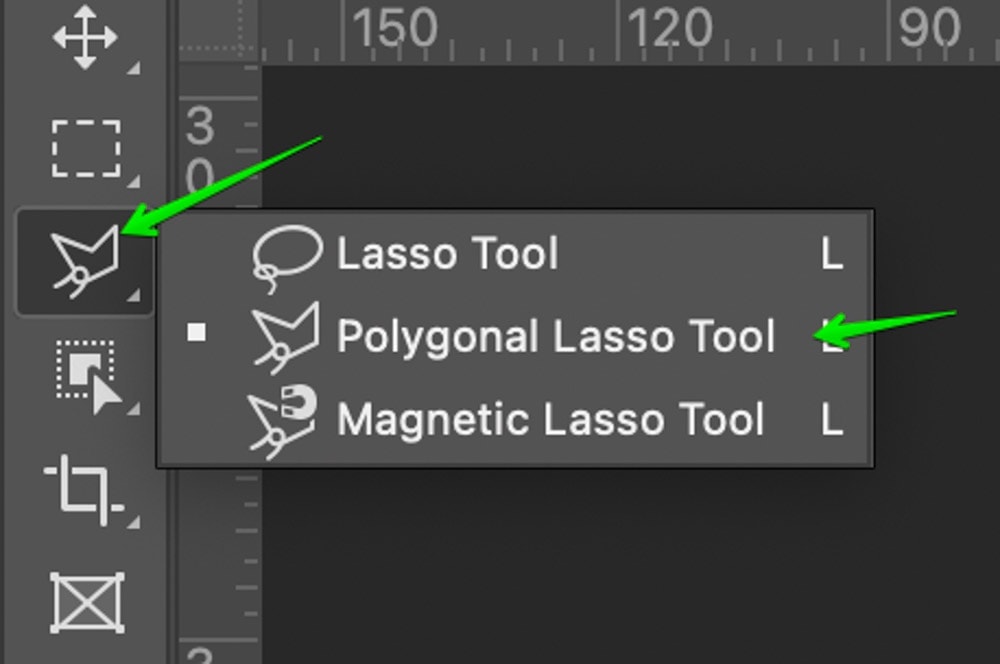
The Polygonal Lasso Tool is just nether the Lasso Tool. If you don't see it, right-click on the icon under the Lasso Tool and select Polygonal Lasso Tool from the drop-downwards menu.
Step ii: Brand A Diagonal Selection
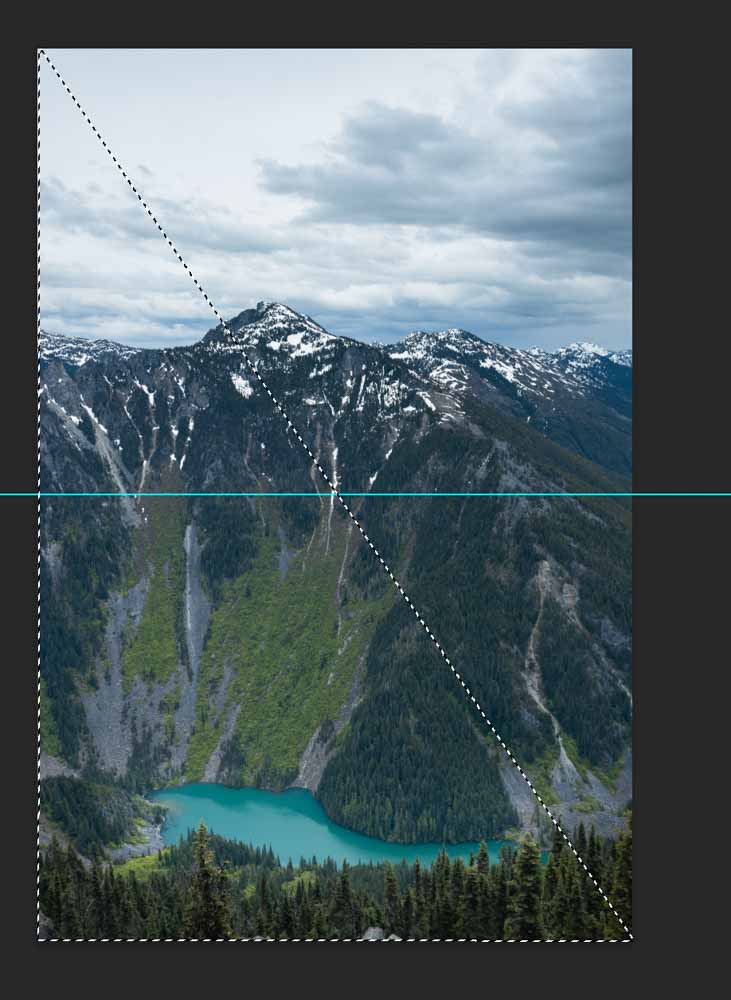
Armed with the Polygonal Lasso Tool nosotros are going to make a diagonal cut. To do so, just drag your cursor to make a selection. Y'all tin as well make an anchor point by clicking on your mouse so that yous can accommodate the shape of the pick drawn. Here's what the diagonal pick looks like in my example:
Step 3: Brand The Split
Now to split the image in 2, go to Layer > New > Layer via cutting. Alternatively use the keyboard shortcut Shift + Control/Command + J.
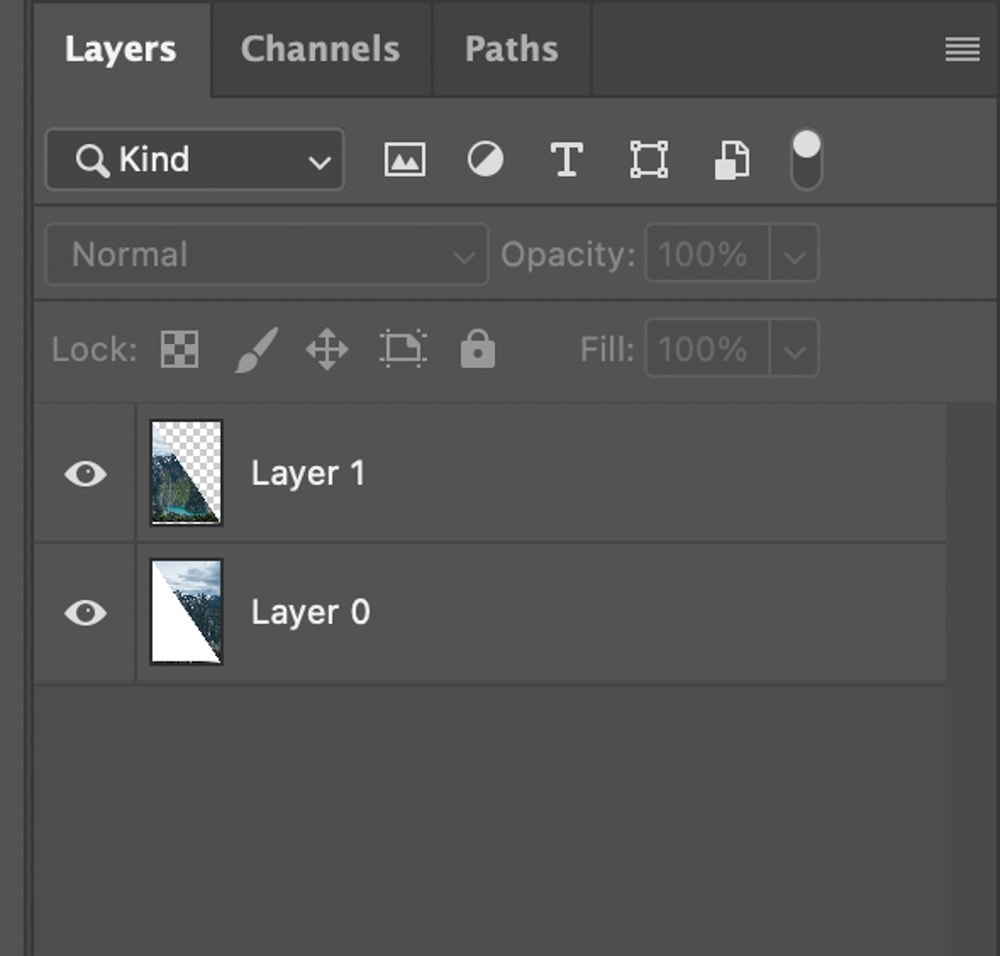
And at present you'll run into the layer console conform accordingly.
Here's how our prototype looks like when it'south diagonally carve up:
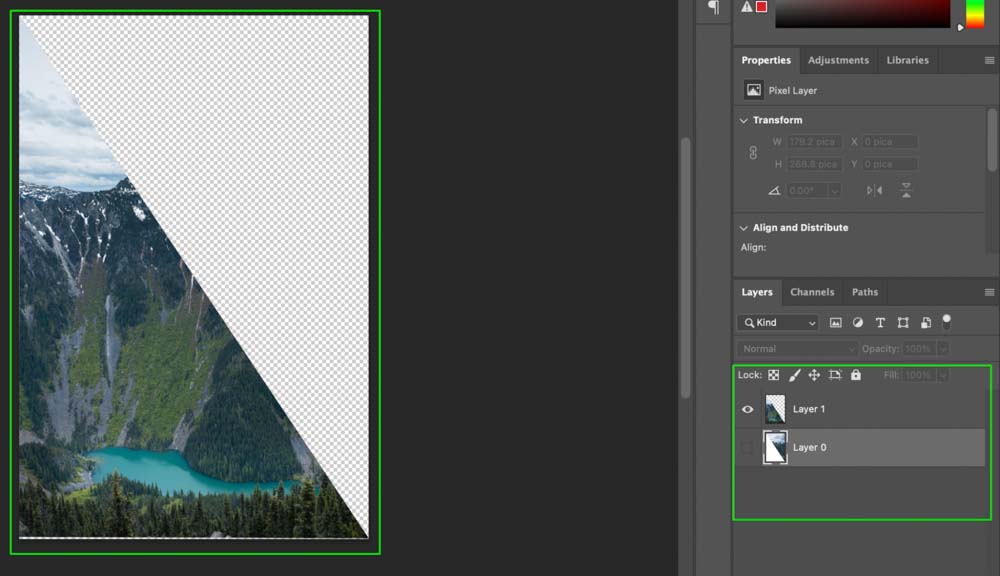
Now you can apply each half of your photo independently!
How To Save Slices As Split Images In Photoshop
If you want to export the unlike split images there is an easy way to consign layers to files in Photoshop.
Footstep i: Go To File > Export > Layers To Files
In one case your epitome is split up, in the peak bar go to File > Export > Layers to Files.

Step two: Select A File Format
Now you will come across a box where you lot will have various export options.
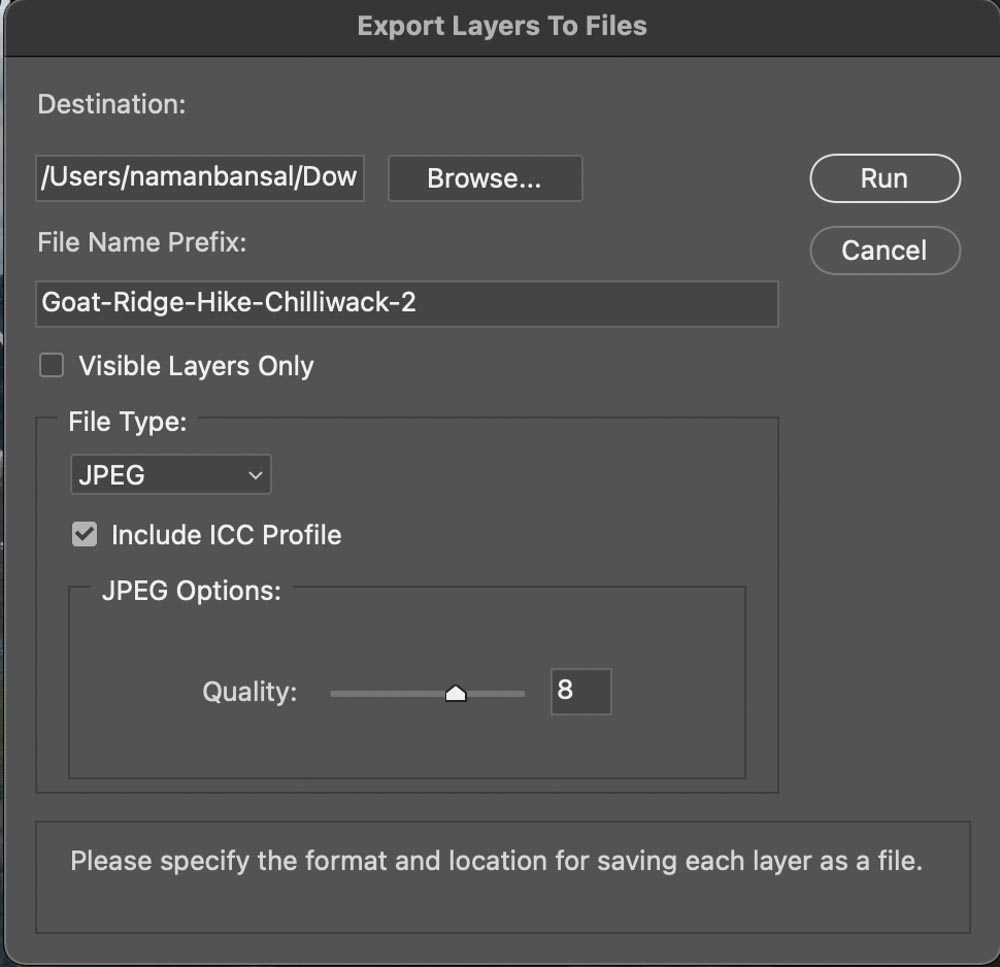
First of all, you lot need to select the file format y'all want to export the layers in. Photoshop has a lot of file formats bachelor. Here'southward a breakdown of the popular ones:
JPEG: This is probably the most common prototype format along with PNG and it compresses your images a bit for lower file sizes simply information technology isn't noticeable to the man centre nether normal circumstances. This file type is all-time for full general utilise and is compatible with any device or program.
PDF: PDF stands for 'Portable Document Format'. This was developed by Adobe. These files are mostly used for printing and certificate purposes and the best part is that these files are highly portable and do not mess with the contents of your images. These are mostly used for legal and business concern purposes or to create multi-folio documents in Photoshop.
PSD: PSD stands for Photoshop Documents and this is the format that is used to store Photoshop projects. These files are supported by many image editing programs and store your files in loftier quality while remembering layer information. Yous tin learn more well-nigh this file blazon here.
TIFF: TIFF stands for Tag Image File Format and is used mostly for storing high-quality graphics meant for editing. It isn't used on the spider web merely works well to salvage RAW images since it retains all of the color information without compression.
PNG: This is one of the most popular file formats and is used a lot on the spider web. This stores your images without pinch and makes them high-quality. Information technology is also used for transparency.
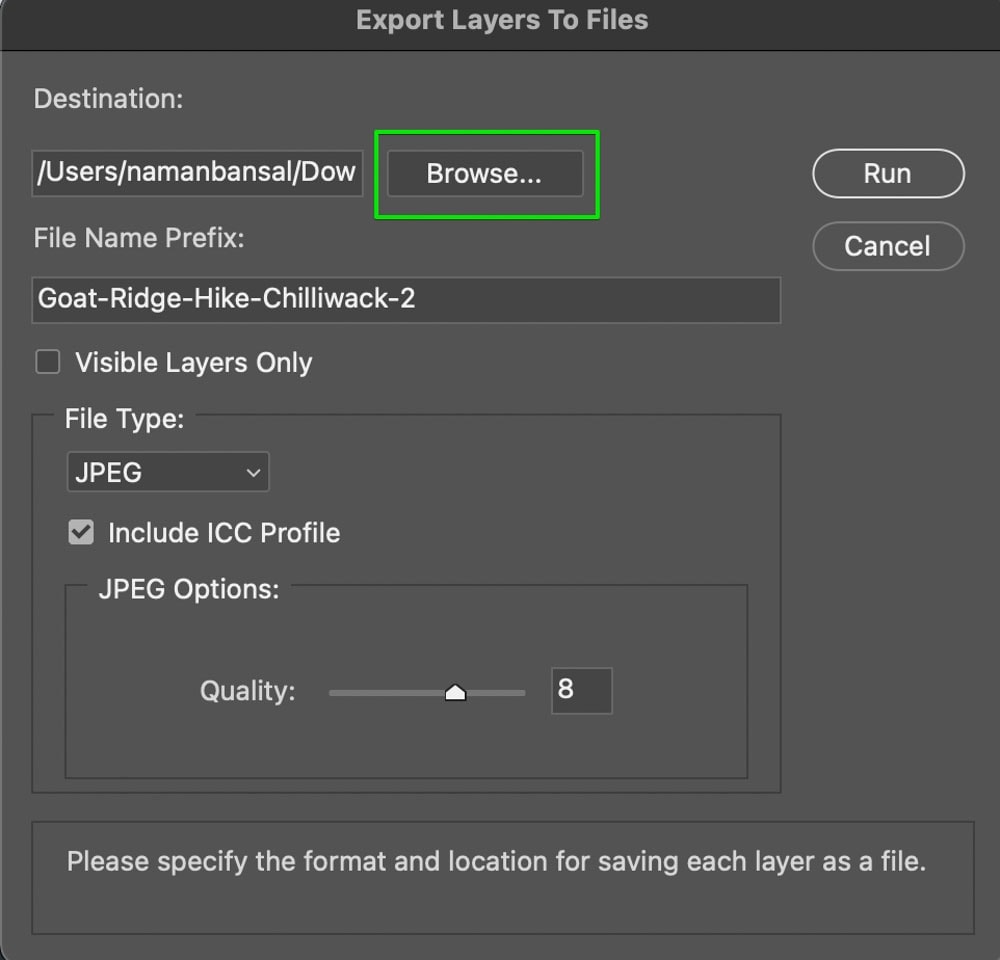
Step three: Cull An Export Location
Now select the location where you want to save your exported layers. Click on the 'Browse' button to select a location from your computer.
Step 4: Create A Proper name For The Exported Layers
Next, select the file name prefix for the name of exported files. This will exist the name of your exported layers establish in your consign location.
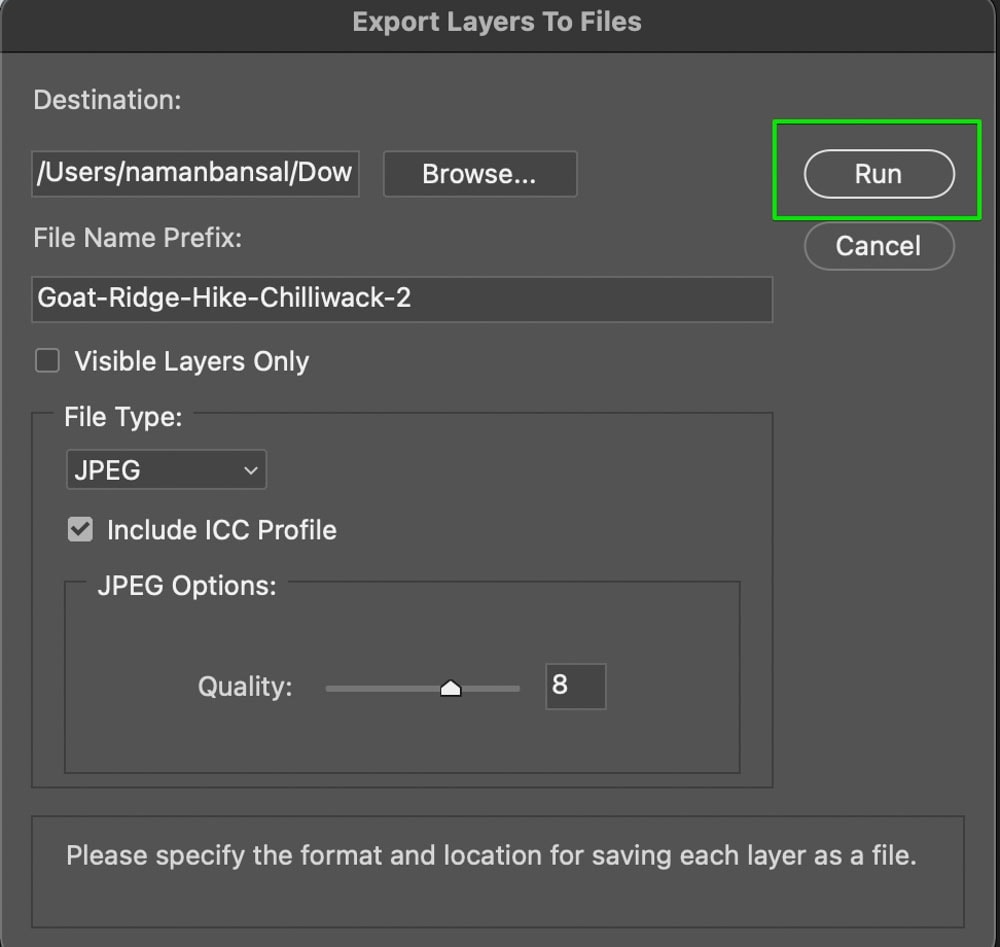
Pace five: Click "Run" To Export The Layers
At present, to consign those layers, click on 'Run'. Now Photoshop will export your split image into 2 unlike files in your export location.
So with these like shooting fish in a barrel techniques, you can chop-chop split an image in half vertically, horizontally, or diagonally in Photoshop. Then with the export layers to files technique, you can hands have your images are two separate files to employ later on. I recommend exporting your split images every bit PNG files to preserve the transparency and make it easier to work with the two files later on.
Happy Editing!
Source: https://www.bwillcreative.com/how-to-cut-an-image-in-half-in-photoshop/#:~:text=To%20split%20images%20in%20half,half%20on%20a%20new%20layer.
Posted by: johnsonfrony1967.blogspot.com
0 Response to "How To Cut Something In Half In Photoshop"
Post a Comment